











• Skip to primary navigation
  • Skip to main content
  • Skip to primary sidebar
The Daily Dish
  • About Me
  • Recipes
  • Wellbeing🧡
  • Contact
  • Subscribe
  • Gluten-Free
  • Navigation Menu: Social Icons

    Connect With Me

    • Facebook
    • Instagram
    • Pinterest
menu icon
go to homepage
  • About Me
  • Recipes
  • Wellbeing🧡
  • Contact
  • Subscribe
  • Gluten-Free
  • Let's Connect

    • Facebook
    • Instagram
    • Pinterest
  • subscribe
    search icon
    Homepage link
    • About Me
    • Recipes
    • Wellbeing🧡
    • Contact
    • Subscribe
    • Gluten-Free
  • Let's Connect

    • Facebook
    • Instagram
    • Pinterest
  • ×
    • 15 Places In Texas To Enjoy Breakfast With A Million-Dollar View
    • 12 Cincinnati Area, Ohio Hole-In-The-Wall Restaurants Tourists Always Walk Past
    • 11 Anna Maria Island Restaurants In Florida You Can't Miss
    • 12 Maryland Restaurants That Stay Packed Without Ever Advertising
    • 14 Florida Buffets So Good You Won't Mind The Wait
    • 13 Under-The-Radar Detroit, Michigan Restaurants Worth Seeking Out
    • 12 Tennessee Restaurants So Remote The Journey Becomes Part Of The Experience
    • 11 Atlanta, Georgia Hole-In-The-Wall Restaurants Locals Love
    • 11 Top-Rated Restaurants In New Jersey That Are Always Worth The Trip
    • 10 Small Local Restaurants In Marietta, Georgia Worth A Visit
    • 11 Top-Rated Restaurants In Maryland That Are Always Worth The Drive
    • 12 Winston-Salem, North Carolina Hole-In-The-Wall Restaurants Only Locals Know About
    Home » Recommendations

    How To Make A Homemade Gingerbread House That Looks Spectacular

    Published:Dec 16, 2025· Modified: Dec 15, 2025 by Ruby Carter

    • Share
    • Email

    Building a gingerbread house isn’t just baking - it’s edible architecture with a side of festive fun.

    Whether you’re going for charmingly rustic or straight-out-of-a-fairytale perfect, the secret lies in sturdy dough and creative decoration.

    Get ready to roll, cut, and build your way to a show-stopping centrepiece that’s as fun to make as it is to admire.

    All information is provided for general interest only. Results may vary depending on skill level, ingredients, and equipment used.

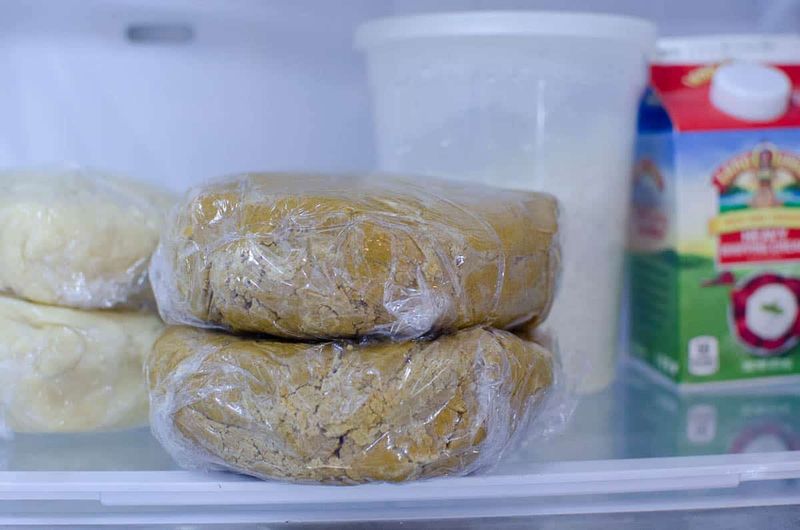
    1. Prepare And Chill The Gingerbread Dough
    Prepare And Chill The Gingerbread Dough
    Image Credit: © Seeded At The Table

    Start by mixing flour, butter, sugar, golden syrup, and warm spices like ginger, cinnamon, and cloves until everything comes together into a smooth dough.

    Wrap it tightly in cling film and pop it in the fridge for at least an hour.

    Chilling makes the dough firm and much easier to roll out without it sticking everywhere or losing its shape during cutting.

    2. Roll Out Even Sheets And Cut Template Shapes

    Roll Out Even Sheets And Cut Template Shapes
    Image Credit: © Allrecipes

    Roll your chilled dough between two sheets of baking parchment to about 5mm thickness, keeping it uniform across the entire surface.

    Print or draw templates for walls, roof panels, and any extra decorative pieces you fancy adding.

    Cut carefully around each template with a sharp knife, then gently peel away excess dough to reuse for more pieces or biscuits.

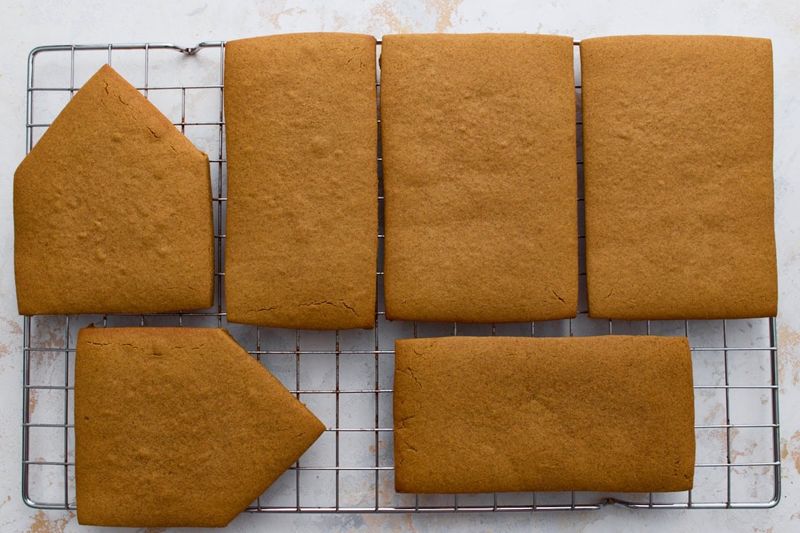
    3. Bake Until Firm And Let The Pieces Cool Completely
    Bake Until Firm And Let The Pieces Cool Completely
    Image Credit: © Mama Knows Gluten Free

    Slide your cut shapes onto lined baking trays and bake at 180°C until the edges turn golden and the centres feel firm when lightly pressed.

    Timing varies, but usually takes around 12 to 15 minutes depending on thickness.

    Allow everything to cool completely on wire racks before handling, as warm gingerbread is fragile and can snap easily during assembly.

    4. Make A Thick Royal Icing For Assembly

    Make A Thick Royal Icing For Assembly
    Image Credit: © Eater

    Whisk together icing sugar and egg whites or aquafaba until you achieve a thick, paste-like consistency that holds stiff peaks when lifted.

    This acts as your edible cement, holding walls and roof panels securely in place.

    Royal icing dries rock-hard within a few hours, creating a sturdy bond that keeps your gingerbread house standing tall for weeks if stored properly.

    5. Use Cans Or Cups To Support Walls While Drying

    Use Cans Or Cups To Support Walls While Drying
    Image Credit: © Ask Carolyn

    Pipe a generous line of royal icing along the base and edges of each wall piece, then press them together gently on your display board.

    Prop them up with tins, jars, or mugs on both sides to prevent wobbling or collapsing.

    Leave everything undisturbed for at least two hours so the icing can set completely before adding the roof or removing your makeshift supports.

    6. Add The Roof Panels Once The Base Is Stable

    Add The Roof Panels Once The Base Is Stable
    Image Credit: © Food & Wine

    Once your walls are rock-solid, pipe thick lines of royal icing along the top edges where the roof will rest.

    Gently position each roof panel, holding them steady for a minute or two until the icing grips.

    You might need a friend to help balance both sides simultaneously, especially if your roof pieces are large or heavy with decorations already attached.

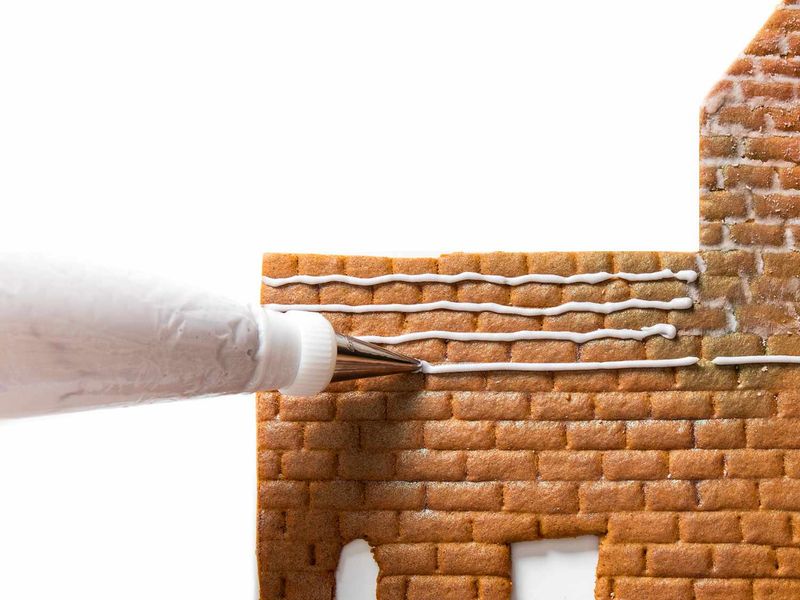
    7. Pipe Icing Along Seams For Extra Strength
    Pipe Icing Along Seams For Extra Strength
    Image Credit: © Serious Eats

    Run a piping bag filled with royal icing along every joint, corner, and seam both inside and outside your structure.

    This reinforces weak spots and fills any gaps that might compromise stability.

    Think of it as adding extra mortar to brickwork - the more you use, the stronger your house becomes, ensuring it survives transport, display, and enthusiastic little fingers poking around.

    8. Decorate With Sweets, Icing, And Sparkly Sugar

    Decorate With Sweets, Icing, And Sparkly Sugar
    Image Credit: © NYT Cooking - The New York Times

    Now comes the best part - letting your creativity run wild!

    Stick on colourful sweets, chocolate buttons, candy canes, and liquorice using dabs of royal icing as glue.

    Pipe decorative patterns like snow drips, window frames, or roof tiles with icing, then sprinkle edible glitter or sanding sugar over wet icing for a magical, frosty sparkle that catches the light beautifully.

    9. Display On A Board And Dust Lightly With Icing Sugar

    Display On A Board And Dust Lightly With Icing Sugar
    Image Credit: © Dr. Oetker

    Place your completed masterpiece on a sturdy cake board or decorative tray that's easy to move without damaging your hard work.

    Use a fine sieve to dust icing sugar over the roof and surroundings, creating a fresh snowfall effect.

    Add miniature trees, figurines, or fairy lights around the base to create a charming winter scene that becomes a stunning centrepiece for your holiday table.


    More Recommendations

    • 16 Surprisingly Useful Things To Cook When You Have Too Much Cheese And Not Enough Ideas
    • 21 Copycat Recipes That Might Make You Skip The Takeaway Altogether
    • 17 Cheap Meals That Taste Far Better Than Their Tiny Price Tag Suggests
    • 21 Everyday Foods Prepared Completely Differently Across Five Continents

    Primary Sidebar

    Keri Bevan

    Welcome, I'm Keri

    I'm the food photographer and recipe developer and writer behind Daily Dish.

    More About Me
    SUBSCRIBE

    Popular Posts

    • 13 Under-The-Radar Florida Beachfront Restaurants Locals Keep To Themselves
    • 12 Small-Town New York Diners With Huge Pancakes And Classic Comfort Food Locals Call The Best
    • 11 Breathtaking Waterfront Restaurants You'll Only Find In New Jersey
    • 12 Michigan Factory Tours Worth Taking For A Surprisingly Cool Day Trip

    Cozy Soups

    • Fava bean soup in a ceramic bowl.
      Fava Bean Soup
    • Vegan potato soup in a bowl with chives and croutons.
      Creamy Vegan Potato Soup
    • Bok choy soup with garlic and ginger.
      Bok Choy Soup With Garlic & Ginger
    • gluten free and dairy free tomato soup
      Creamy Gluten Free And Dairy Free Tomato Soup
    Company logs of people I have worked with.

    Footer

    ↑ back to top

    Recipes

    • Breakfast
    • Lunch
    • Dinner
    • Sauces and Dips
    • Gluten Free

    Newsletter

    • Sign Up! for emails and updates

    Contact

    • Contact
    • Privacy Policy
    • Daily Dish Web Stories

    As an Amazon Associate I earn from qualifying purchases.

    Copyright © 2024 Daily Dish

