











• Skip to primary navigation
  • Skip to main content
  • Skip to primary sidebar
The Daily Dish
  • About Me
  • Recipes
  • Wellbeing🧡
  • Contact
  • Subscribe
  • Gluten-Free
  • Navigation Menu: Social Icons

    Connect With Me

    • Facebook
    • Instagram
    • Pinterest
menu icon
go to homepage
  • About Me
  • Recipes
  • Wellbeing🧡
  • Contact
  • Subscribe
  • Gluten-Free
  • Let's Connect

    • Facebook
    • Instagram
    • Pinterest
  • subscribe
    search icon
    Homepage link
    • About Me
    • Recipes
    • Wellbeing🧡
    • Contact
    • Subscribe
    • Gluten-Free
  • Let's Connect

    • Facebook
    • Instagram
    • Pinterest
  • ×
    • 15 Places In Texas To Enjoy Breakfast With A Million-Dollar View
    • 12 Cincinnati Area, Ohio Hole-In-The-Wall Restaurants Tourists Always Walk Past
    • 11 Anna Maria Island Restaurants In Florida You Can't Miss
    • 12 Maryland Restaurants That Stay Packed Without Ever Advertising
    • 14 Florida Buffets So Good You Won't Mind The Wait
    • 13 Under-The-Radar Detroit, Michigan Restaurants Worth Seeking Out
    • 12 Tennessee Restaurants So Remote The Journey Becomes Part Of The Experience
    • 11 Atlanta, Georgia Hole-In-The-Wall Restaurants Locals Love
    • 11 Top-Rated Restaurants In New Jersey That Are Always Worth The Trip
    • 10 Small Local Restaurants In Marietta, Georgia Worth A Visit
    • 11 Top-Rated Restaurants In Maryland That Are Always Worth The Drive
    • 12 Winston-Salem, North Carolina Hole-In-The-Wall Restaurants Only Locals Know About
    Home » Recommendations

    A Practical Guide To Making Sourdough Bread At Home

    Published:Jan 7, 2026· Modified: Jan 7, 2026 by Freddie Clarke

    • Share
    • Email

    There’s something deeply satisfying about turning flour, water, and time into a loaf that fills the kitchen with that unmistakable fresh-bread aroma.

    Sourdough baking feels a little bit like caring for a living thing, which makes the process surprisingly rewarding once you get the rhythm right.

    With a few simple steps and a little patience, homemade loaves quickly become part of your everyday routine.

    All information is provided for general interest only. This content is intended as general guidance and does not replace professional culinary instruction or food safety advice. Results may vary depending on ingredients, environment, and individual technique.

    1. Feed And Activate The Starter

    Feed And Activate The Starter
    Image Credit: © Natasha's Kitchen

    Your starter is the heart of sourdough, so treat it with care.

    About 4-12 hours before mixing your dough, feed it with equal parts flour and water to wake up those wild yeasts.

    You'll know it's ready when it doubles in size and looks bubbly and lively.

    A well-fed starter gives your bread that signature tangy flavour and beautiful rise.

    2. Measure And Mix Ingredients
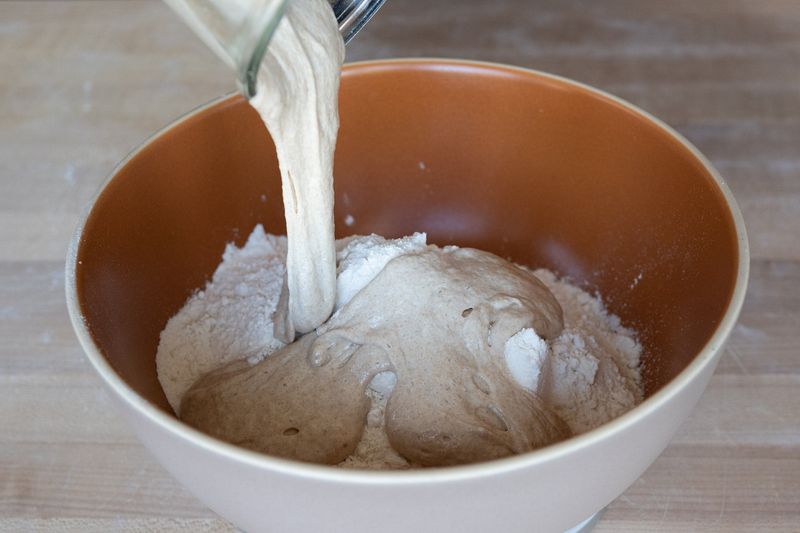
    Measure And Mix Ingredients
    Image Credit: © King Arthur Baking

    Grab your scales and weigh out your flour, water, starter, and salt carefully - precision matters here.

    Combine the flour and water first, stirring until no dry bits remain, then let it rest for about 30 minutes.

    This autolyse step helps the flour absorb water fully.

    Afterwards, add your starter and salt, mixing everything thoroughly until smooth.

    3. Rest The Dough
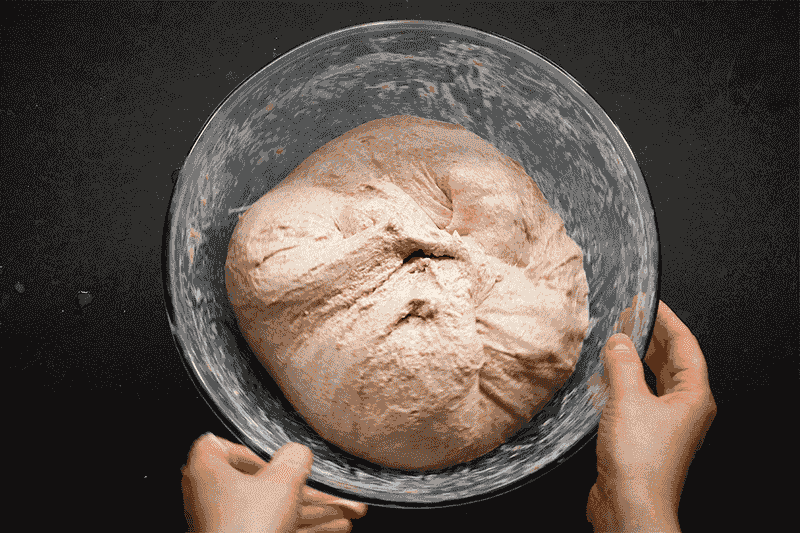
    Rest The Dough
    Image Credit: © NYT Cooking - The New York Times

    Once mixed, your dough needs time to relax and develop gluten naturally.

    Cover the bowl with a damp tea towel or cling film and leave it somewhere warm for around 30 minutes to an hour.

    During this rest, the dough becomes easier to handle and the gluten structure begins forming.

    Patience here pays off with better texture later.

    4. Stretch And Fold The Dough
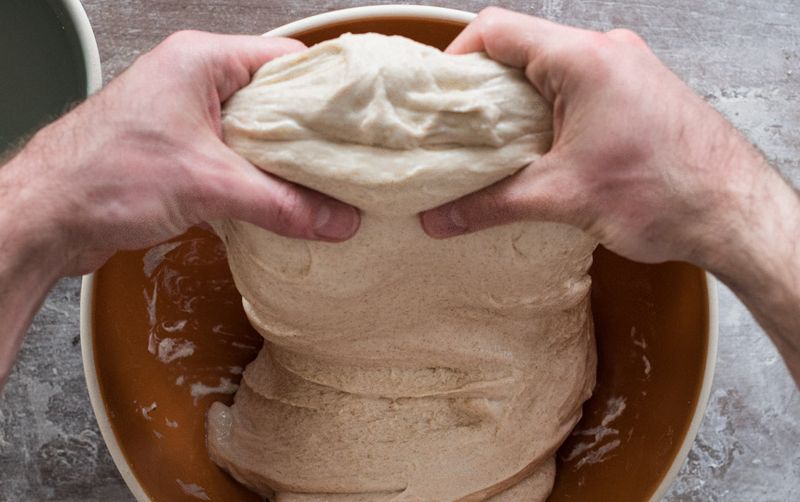
    Stretch And Fold The Dough
    Image Credit: © Your Sourdough Start

    Instead of kneading, sourdough loves a gentler approach called stretch and fold.

    Wet your hands, grab one side of the dough, stretch it upwards, then fold it over itself.

    Rotate the bowl and repeat on all four sides. Do this every 30 minutes for about 2-3 hours total.

    This builds strength without overworking the dough.

    5. Let The Dough Ferment
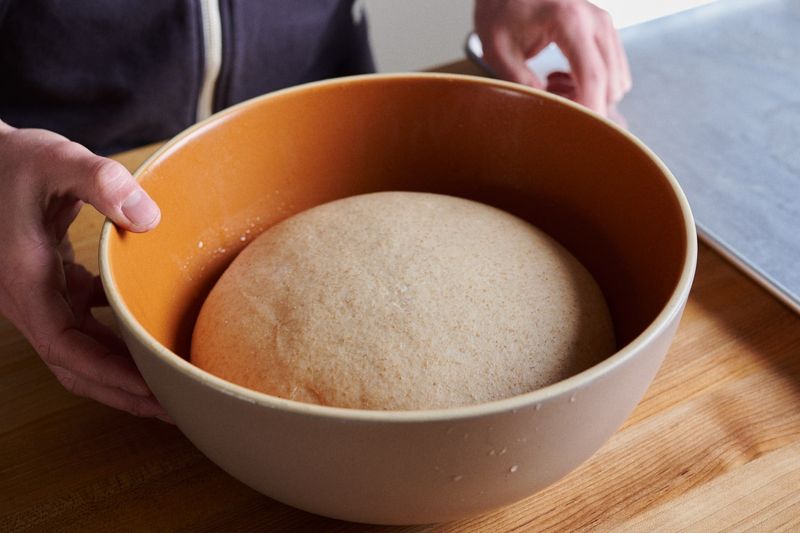
    Let The Dough Ferment
    Image Credit: © The Perfect Loaf

    After your final stretch and fold, it's time for bulk fermentation - the stage where magic happens.

    Leave the dough covered at room temperature for 4-6 hours, depending on warmth.

    Watch for it to puff up and show bubbles on the surface and sides.

    The dough should feel airy and jiggly when gently shaken, signalling it's ready.

    6. Shape The Loaf

    Shape The Loaf
    Image Credit: © Matthew James Duffy

    Turn your dough out onto a lightly floured surface and shape it into a tight ball or oval, depending on your preference.

    Use your hands to create surface tension by pulling the dough towards you.

    This tension helps the loaf hold its shape and rise beautifully during baking.

    Place it seam-side up in a floured banneton or bowl.

    7. Cold Prove For Better Flavour
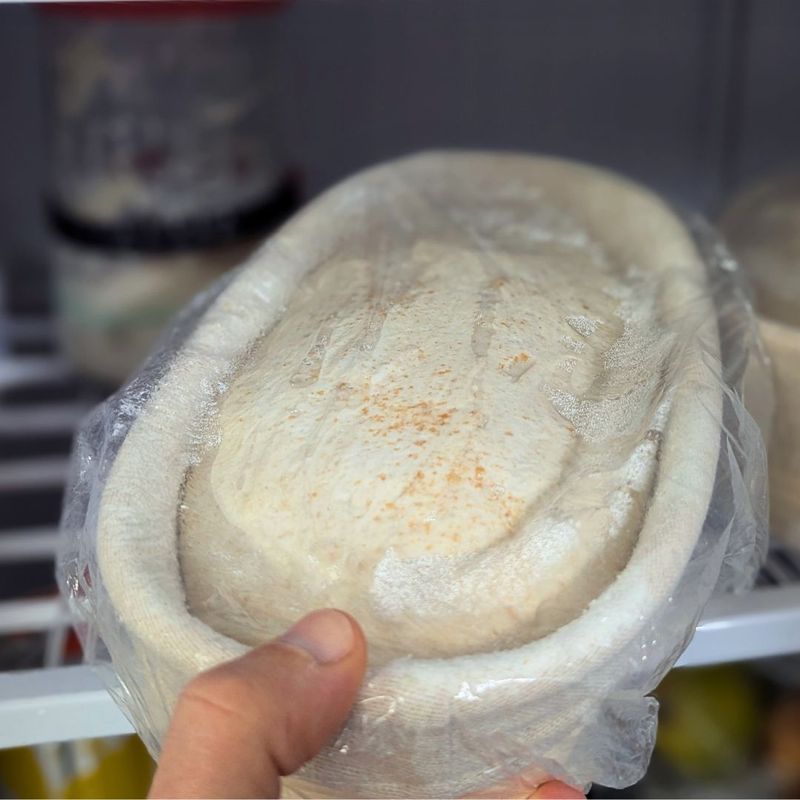
    Cold Prove For Better Flavour
    Image Credit: © Sherwood Coffee 'n' Bread

    Pop your shaped dough into the fridge for an overnight cold prove, typically 8-12 hours.

    This slow fermentation deepens the flavour, making it tangier and more complex.

    Cold dough is also much easier to score neatly before baking.

    Don't skip this step - it's a game-changer for taste and texture in your final loaf.

    8. Preheat The Oven

    Preheat The Oven
    Image Credit: © Solar Refrigeration & Appliance Service

    About an hour before baking, crank your oven up to 230°C (450°F) and place a Dutch oven or heavy pot inside to heat thoroughly.

    A scorching hot pot mimics a professional steam oven.

    This creates the perfect environment for a crispy, golden crust and impressive oven spring.

    Proper preheating is absolutely essential for bakery-quality results at home.

    9. Score And Bake The Bread

    Score And Bake The Bread
    Image Credit: © The Spruce Eats

    Carefully tip your cold dough onto baking parchment, then use a sharp blade or lame to score the top with quick, confident cuts.

    Scoring controls where the bread expands and adds beautiful design.

    Lower it into the hot pot, cover with the lid, and bake for 20 minutes.

    Then remove the lid and bake another 25-30 minutes until deeply golden.

    10. Cool Before Slicing

    Cool Before Slicing
    Image Credit: © Pngtree

    As tempting as it is to slice immediately, resist!

    Your bread is still cooking inside from residual heat, and cutting too soon releases steam, making the crumb gummy.

    Let it cool on a wire rack for at least an hour, ideally two.

    Once cooled, you'll be rewarded with perfect texture, clean slices, and that irresistible sourdough chew.


    More Recommendations

    • 16 Surprisingly Useful Things To Cook When You Have Too Much Cheese And Not Enough Ideas
    • 21 Copycat Recipes That Might Make You Skip The Takeaway Altogether
    • 17 Cheap Meals That Taste Far Better Than Their Tiny Price Tag Suggests
    • 21 Everyday Foods Prepared Completely Differently Across Five Continents

    Primary Sidebar

    Keri Bevan

    Welcome, I'm Keri

    I'm the food photographer and recipe developer and writer behind Daily Dish.

    More About Me
    SUBSCRIBE

    Popular Posts

    • 13 Under-The-Radar Florida Beachfront Restaurants Locals Keep To Themselves
    • 12 Small-Town New York Diners With Huge Pancakes And Classic Comfort Food Locals Call The Best
    • 11 Breathtaking Waterfront Restaurants You'll Only Find In New Jersey
    • 12 Michigan Factory Tours Worth Taking For A Surprisingly Cool Day Trip

    Cozy Soups

    • Fava bean soup in a ceramic bowl.
      Fava Bean Soup
    • Vegan potato soup in a bowl with chives and croutons.
      Creamy Vegan Potato Soup
    • Bok choy soup with garlic and ginger.
      Bok Choy Soup With Garlic & Ginger
    • gluten free and dairy free tomato soup
      Creamy Gluten Free And Dairy Free Tomato Soup
    Company logs of people I have worked with.

    Footer

    ↑ back to top

    Recipes

    • Breakfast
    • Lunch
    • Dinner
    • Sauces and Dips
    • Gluten Free

    Newsletter

    • Sign Up! for emails and updates

    Contact

    • Contact
    • Privacy Policy
    • Daily Dish Web Stories

    As an Amazon Associate I earn from qualifying purchases.

    Copyright © 2024 Daily Dish

